The iPhone has a low light mode that improves the quality of the photo taken in dark conditions. You can use this feature manually or automatically. A tripod or another steady object can be used to create a polished image. You can also use third-party apps like Snapseed and Photoshop. This feature is very useful for indoor photography, especially when there is limited natural light.
You can also use a tripod or Joby GorillaPod to capture better low-light photos. These accessories will give you a longer exposure time and improved clarity. They allow you to manually adjust the depth and field.
However, you can only use this feature in low light situations. You must also ensure your iPhone remains still. Holding it too hard or moving it too quickly will result in blurry photos.
Night Mode is a simple way to capture stunning images in low light conditions. The feature activates the small moon symbol in your photo viewfinder. The amount of light detected will affect the icon's appearance. An iPhone can capture multiple photos with different exposures. All of these shots are stitched together to create the perfect picture in low light situations.
Other features include a brighter flashlight and optical picture stabilization. You may need the shutter speed adjusted for low light in order to avoid motion blur. The ISO should be kept below 120 if your telephoto lens is not available. Although this is not the best option for low light photography, it's not necessarily a bad idea.
Even though the night mode is not compatible with all environments, it works well. This is especially useful when taking photos of twinkling lights or an evening cityscape. There is an additional feature called Portrait Lighting that intelligently adds lighting to your photos.
BlackSight is one of the most prominent features of Night mode. This is a combination algorithm of image processing algorithms that creates better color and a long exposure. This is the first iOS camera that offers this feature. It makes it possible to create better low-light pictures.
The iPhone X comes with a built-in lens which opens to f/2.4. This is sufficient for low light photography. You will need to adjust the depth-of-field manually if you don't have a telephoto zoom lens.
It's not as easy as it seems. For the best photos, it is essential to be still. No matter whether your phone is placed on a tripod or rested on a stable surface for nighttime photography, it should still be possible to capture decent results. Even though you won't be able to keep your phone still as long as necessary to capture the best light, it is possible to take a decent nighttime photo.
FAQ
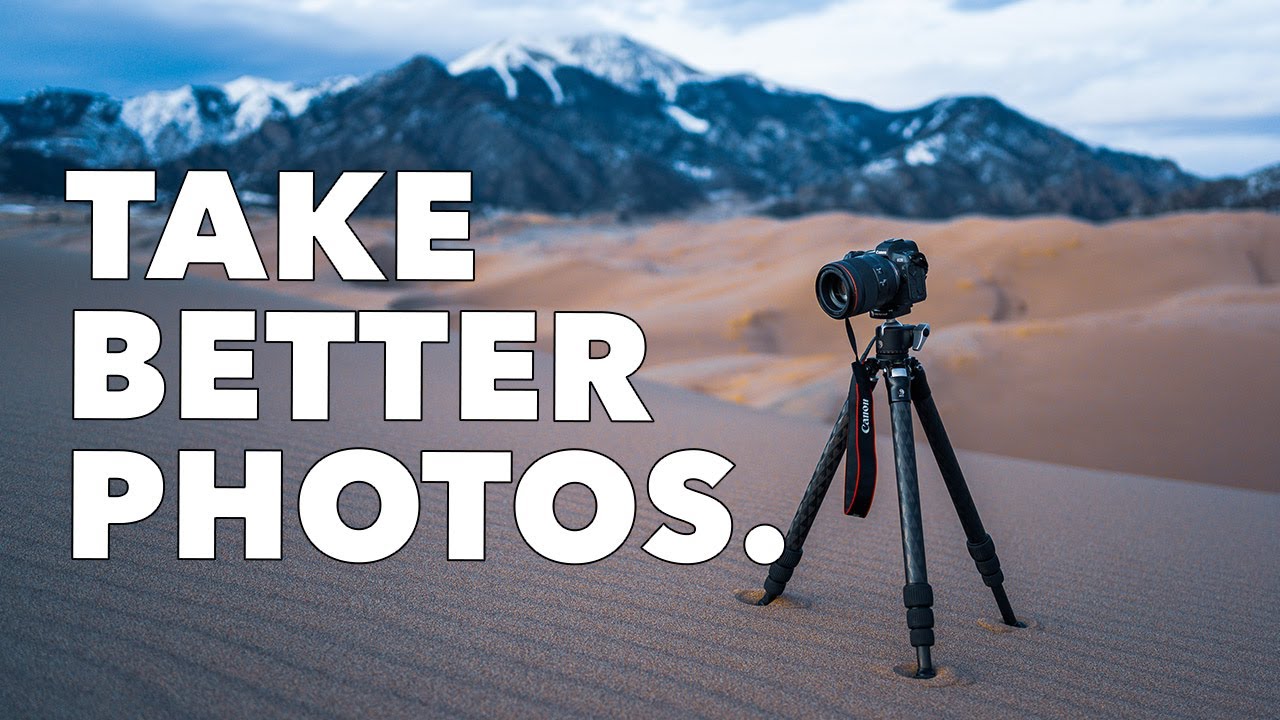
Do I Need A Tripod?
This is one of those questions that everyone asks. The truth is that a tripod isn't always necessary, but it can come in handy.
This allows you to keep your camera steady even when taking slow shutter speeds. If you're shooting landscapes or other stationary subjects, then a tripod can make a big difference.
On the other hand, if you're photographing moving subjects such as sports or people, using a tripod can cause blurriness. So, how do you know which situations require a tripod?
A tripod can be useful in any situation where you need to capture fast action or stationary subjects. Examples include:
-
Sports
-
People
-
Landscapes
-
Close-ups
-
Macro shots
Try this test to find out if you really need a tripod. Look through the viewfinder with your camera steady. A tripod is necessary if you notice blurred lines or movement.
If you don’t see blurring, adding a tripod is unlikely to make any difference.
These tips will help you make the right decision about whether to invest in a tripod.
-
Smooth legs are a must for your tripod. This prevents unwanted vibrations from shaking your camera.
-
Choose a sturdy tripod. Some tripods are made of plastic, so they may not be as durable. Consider a tripod made of metal.
-
You may want to consider buying a remote-control device. This allows you to control your camera remotely. Once you press the button, it will automatically fire the shutter.
-
You should look for a tripod with 360 degree rotation. It makes it easy to position your camera horizontally or vertically.
-
Keep in mind that tripods aren't cheap. Expect to pay $100-200. However, you'll get a lot of value for your money.
-
Accessories such as filters and memory cards should be considered.
-
Before shopping online, be sure to visit your local shop. Many retailers offer free shipping.
-
Review a product to find out what other customers think.
-
Ask your family members and friends to recommend similar products.
-
You can learn from customers' experiences by visiting message boards and forums.
-
User reviews can be found online.
-
Amazon.com offers the ability to search for prices and view customer feedback.
-
See photo galleries to see some of the creative uses for tripods by photographers.
How do I look good in pictures?
You will look your best in photos if they are taken by you. Learn how to pose and what angles look best. You'll also learn lighting techniques and how to use props to enhance natural beauty.
Learn how to select clothes that fit you well, what make-up looks good on you and what hairstyles best suit your style.
We'll also show you how to retouch images with Photoshop or other editing software if you aren't satisfied with the results.
Don't be afraid to take some self-portraits.
Light Room can be used to enhance your photographs.
It is important to begin early in order to have great photos. It's better to take as much as possible, then select the best.
Lightroom allows this because it lets you see the effects of different settings on each photo. These settings can also be modified on-the-fly in Lightroom without ever having to open Photoshop again. This allows you to quickly test what looks great and what does not.
What is the rule for thirds in photography?
The rule of Thirds allows you to create unique compositions with minimal camera settings. It divides your photo into nine equal parts horizontally as well vertically. This creates three main areas where you want your subject to appear. These are the top (3rd from the left), middle (3rd from center) and bottom (3rd from lower right). These areas can be used to position your subject within your frame.
The rule of thirds also helps you avoid placing important elements too close together or too far apart. They might not have enough space to make an impact on the eye if they are placed close together. If they are placed too far apart, it can cause them to lose focus.
What equipment is necessary to begin digital photography
The first thing you should consider when starting out in digital photography is what type of camera you want to use. There are many options available, including DSLRs (digital single-lens reflex cameras), compact point-and-shoot cameras, camcorders and smartphones. Each model has its own unique features and advantages. For example, DSLR cameras offer high-quality images but are typically larger and heavier than other types of cameras. Point-and shoot cameras are smaller, lighter and have more automatic settings. Camcorders offer excellent video recording capabilities, and may also have still photo shooting modes. Smartphones are small and lightweight so they can be easily carried.
Once you have made your decision on the camera type you wish to purchase, it is time to decide if you want to buy a used one or a brand new one. Cameras that have been used in recent years can often be found for a reasonable price. New models generally cost more because manufacturers spend large amounts of money developing new technology.
Next, you will need lenses. Lenses are a critical part of determining the quality your photos. They allow you to control the lens's focal length, allowing you to zoom into the scene without losing focus. Some lenses come with built-in flash units while others need external flash units. Many brands offer many lenses with unique characteristics.
Finally, you'll need to buy memory cards. Memory cards are used to store images taken with your camera. You can store hundreds, thousands, or even more pictures depending on the size of the card. If you plan to shoot lots of pictures, you will need multiple memory cards.
How can I learn photography by myself?
There are many ways you can learn to take great pictures. You have the option to buy a book and attend classes, join an on-line community, or watch YouTube tutorials. If you really want to learn how to take pictures, it's best to do it yourself. You have full control over the final product. As long as you continue learning, you will always be improving.
One of the best aspects about digital photography is that it doesn't require any expensive equipment. All you need is an internet connected computer and a camera. All the rest is up to your imagination.
Here are some tips for getting started:
-
Acquaint yourself with the manual settings of your camera.
-
Learn how the basic controls work.
-
Take lots of photos.
-
Modify them.
-
Share them.
-
Keep practicing.
-
Experiment.
-
Explore different perspectives and angles.
-
Use light sources creatively.
-
Practice makes perfect.
-
You don't have to be afraid of failing.
-
Be patient.
-
Have fun
What is a good camera bag?
Choosing a camera bag is important because it protects your gear while traveling. These are some important things to keep in mind as you choose a bag.
-
Sizing: A large bag will hold your camera and other accessories. Don't go bigger than you think you will need.
-
Durability: Look for bags made of durable materials such as leather, canvas, nylon, or polyester. Avoid plastic and fabric bags.
-
Protection: Make certain your bag is protected against dirt, dust, moisture, and scratches
-
Organization: To make it easier to find what you need, organize your gear according to type. For example, put your lenses in one compartment, your memory cards in another, and your battery charger in yet another.
-
Comfort: A shoulder strap is a better choice than a handbag for shooting. You should also look for a design that is comfortable and has padded straps.
-
Price: Compare prices to get the best deal. Some brands sell their products at discount prices, which can be an added bonus.
-
Warranty: Find out if your company offers a guarantee on its products. You will know who to call if your bag gets damaged.
Statistics
- By March 2014, about 3 million were purchased monthly, about 30 percent of the peak sales total. (en.wikipedia.org)
- The second easiest way to get blurry photos 100% of the time is to use a cheap filter on the front of your lens. (photographylife.com)
- There are people out there who will pick at flaws they can only see in 100% crops of your photos. (wikihow.com)
- Get 40% off Adobe Creative Cloud(opens in new tab) (creativebloq.com)
External Links
How To
How to take macro shots with photography
Macro photography refers to the ability capture small objects like flowers, insects, or people close up. Macro means large in Greek. If your lens has a focal distance greater than 50mm you can photograph objects that are extremely close up.
A macro lens that is good should have a long working range and a fast aperture to get sharp images. Also, avoid moving while taking photos as it could blur your image.
Here are some great tips to create stunning macro photographs.
-
Use a tripod. Set up a table or chair so you don’t knock anything over. This will make it less likely that you are moving when shooting.
-
Choose the right lighting. Macro lenses usually come with built in light filters. But if you don’t, you can always buy one. It helps to avoid overexposure.
-
Be patient! Shooting macros takes practice. It's not always easy to see the perfect macro, but it is worth trying until you do.
-
Shoot in RAW format. RAW files have more data than JPEGs. They can store more detail. Because you can edit the RAW files later, such as cropping or color corrections, they are ideal for editing.
-
The background is important. The background can be as important as the foreground. You should include it in any photo.
-
Keep learning.