What makes the outdoor IP camera best? This article covers the Reolink RLC-522 and Eudy SoloCam E40. These cameras come with varying levels and features. These are just a few of the other factors to consider when choosing an outdoor IP camera. Keep reading for more information. Keep in mind that your camera must be protected from the elements. If the camera is exposed to a harsh environment, consider getting a weatherproof model.
Eudy SoloCam e40
The Eudy SoloCam E40 IP Security Camera is an affordable and simple to use IP camera for monitoring your property. This camera has a 2K resolution, and 8GB of storage. This camera has military-grade encryption. This makes your footage private and secure. The best thing? It is only $99
The Eufy SoloCam E40 IP surveillance camera is easily mounted and weatherproof to IP65 standards. A rechargeable battery provides up to 120 days of continuous protection. Actual usage, environmental conditions, among other factors, can all affect the battery's life expectancy. The Eufy SoloCam E40 has Wi-Fi compatibility, so it can be installed in remote areas without the need for electricity.
Reolink LLC-522
Reolink's RLC-522IP Camera is an outdoor security solution. It offers nonstop power supply and an extremely wide viewing angle. Its solar panel gives you nonstop power, without the need for dismounting the camera. It has a wide viewing angle of 355deg panning and 140deg tilt. The camera has a 1.2 GHz processor which provides superior image quality. This camera can be used for outdoor surveillance and other purposes.
Reolink RLC-522 has a dome-type housing, which conceals well the camera making it an ideal choice for outdoor installation. The camera is protected from rain, birds, and other environmental elements by its dome-shaped design. Compared to bullet cameras, dome cameras are more unobtrusive. The camera's main frame is matte white, while its stand and base are made of plastic. Reolink RLC-522 supports both iOS and Android OS.
EufyCam 2 Pro
The EufyCam 2 Pro IP Camera is weatherproof, and has excellent image quality. However, it needs the eufy Security HomeBase 2 to work properly. Although it doesn't have the same spotlight as its competitors, the camera's excellent battery life is worth the effort. Although the camera's price is attractive for outdoor use, it has some limitations that you should be aware of.
The base station, which acts as a siren, can be placed anywhere. The EufyCam 2 Pro includes 16GB of memory local and a Wi Fi extender. You can also set up the Eufy Cam 2 Pro with the Eufy HomeBase 2 app. The EufyCam 2 Pro, regardless of storage option, is easy to install. Additionally, the Eufy Security app can be used on both iOS as well as Android devices.
Arlo Ultra 2
Arlo Ultra2 IP camera outdoor features dual-band WiFi. You can switch between 5GHz and 2.4GHz to adjust your connectivity and bandwidth. The Arlo smart hub, the VMB5000 Smart Hub, pairs with this camera. It supports microSD cards, so you can store recordings on the camera itself. This camera is simple and easy to configure. The Arlo Ultra 2 can run for up to 2 months without needing any charging if you are concerned about battery life.
The Arlo 2 IP camera outdoor features full 4K resolution. That's a huge improvement over 1080p. It also features HDR (high dynamic range) technology, which enhances the contrast of the images. This camera is also equipped with color nightvision. With the Arlo Ultra, you can use night vision as well as day vision. For a more affordable option, consider an Arlo subscription. The monthly cost of an Arlo subscription starts at $6
FAQ
What equipment is required to start digital photography?
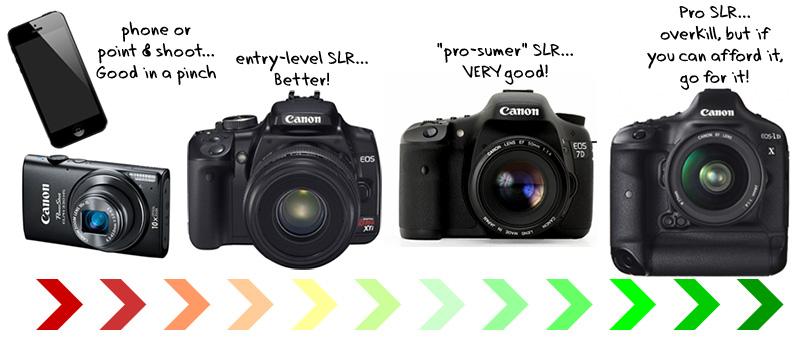
When you start out in digital photography, the first thing to consider is which type of camera you will use. You have several options, including DSLRs (digital single lens reflex cameras), point-and-shoot compact cameras, camcorders, and smartphones. Each has its own benefits and features. DSLR cameras, for example, offer superior quality images but are heavier and larger than other types. Point-and-shoot cameras are smaller and lighter and often include automatic settings for certain situations. Camcorders offer excellent video recording capabilities, and may also have still photo shooting modes. Smartphones are small and lightweight so they can be easily carried.
Once you have made your decision on the camera type you wish to purchase, it is time to decide if you want to buy a used one or a brand new one. If the camera was purchased in the past few years, it is possible to find used cameras at reasonable prices. Newer models usually cost more as manufacturers invest large amounts of money to develop new technology.
Next, purchase lenses. The quality of your photos is directly affected by the lens. They let you adjust the focal length to zoom in and out of the scene, without losing focus. Some lenses are equipped with flash units built in, while others require external flash units. Many brands offer many lenses with unique characteristics.
Finally, memory cards are something you should consider. Memory cards save pictures taken with your camera. Your card's size will determine how many pictures it can store. Multiple memory cards are required if you intend to take many pictures.
What can I do to improve my photography skills with my phone?
Photography doesn't have to be expensive. Amazing images are possible with just a smartphone.
It is easy to learn how to use its various features and some basic techniques.
Many apps are available for iOS and Android that allow you to easily edit and share photos.
Here are five tips to help get you started taking better photos.
-
Set Up Your Camera App. The camera app should be pre-installed on the device. If not, download it from Google Play or Apple's App Store.
-
Use Effects & Filters. You can alter the appearance and feel of your photo using filters and effects.
-
Adjust Exposure. You can control the brightness by changing your exposure.
-
Take the right lighting. It is easier to see details when you shoot in bright light. If you shoot in low light, it is possible to capture shadows or highlights in your photo.
-
Photograph People. Photographing people can show others what you are most passionate about.
You can learn more about how to capture better photos by checking out our article, 5 Tips To Improve Your Photography Skills on a Smartphone
Do I Need A Tripod?
This is one those questions that everyone has to ask. Although a tripod might not always be needed, they can be useful.
It allows you to hold your camera steady when taking pictures at slow shutter speeds. Tripods can be a huge help when you are shooting landscapes or stationary subjects.
A tripod can also cause blurriness when you are photographing people or sports. How do you determine which situations need a tripod?
A tripod is useful when you need to photograph stationary or fast moving subjects. Examples include:
-
Sports
-
People
-
Landscapes
-
Close-ups
-
Macro shots
If you're unsure whether you need a tripod, try this test. You can hold your camera still while you look through the lens. If you see blurred lines or movement, then you definitely need a tripod.
If you don't see any blurring, you probably won't notice any improvement by adding a tripod.
These tips will help you make the right decision about whether to invest in a tripod.
-
Smooth legs are a must for your tripod. This helps to prevent vibrations from shaking the camera.
-
You should choose a sturdy tripod. Some tripods made of plastic may not last very long. Opt for a sturdy metal tripod.
-
Consider purchasing a remote release. This lets you control your camera remotely. Once you press the button, it will automatically fire the shutter.
-
A tripod that can rotate 360 degrees is a good choice. It makes it easy to position your camera horizontally or vertically.
-
You should keep in mind that tripods don't come cheap. Expect to pay around $100-200. You will still get a lot out of your money.
-
Accessories such as filters and memory cards should be considered.
-
Check your local stores before buying online. Many retailers offer shipping free of charge.
-
Review a product to find out what other customers think.
-
Ask friends and family members who own similar products.
-
Forums and message boards are a great place to find out about customer experiences.
-
Look online for user reviews.
-
Amazon.com makes it easy to compare prices and see customer feedback.
-
Browse photo galleries to get an idea of what photographers do with their tripods.
Statistics
- The second easiest way to get blurry photos 100% of the time is to use a cheap filter on the front of your lens. (photographylife.com)
- That's the easiest way to get blurry photos 100% of the time. (photographylife.com)
- Get 40% off Adobe Creative Cloud(opens in new tab) (creativebloq.com)
- While I cannot prove that all of those spots were not sensor dust, the photo was taken during a heavy snowstorm…so I guess that 99.8% of the spots are snowflakes. (bhphotovideo.com)
External Links
How To
How to take macro shots in photography
Macro photography is the ability to capture small objects, such as insects and flowers, at close range. The term "macro" comes from the Greek word makros (makros), meaning large. A lens with a focal length over 50mm can be used to take photos of objects very close up.
A macro lens with a good working distance should be able to capture sharp images even when you are not moving too much. Because of the possibility of blurring your image from movement, you should avoid taking photos while moving.
Here are some tips for taking great macro photographs:
-
Use a tripod. A tripod is a must if you don’t already have one. This way, you'll have less chance of moving while trying to shoot.
-
Choose the right lighting. Macro lenses usually come with built in light filters. But if you don’t, you can always buy one. This helps prevent overexposure.
-
Be patient! Shooting macros takes practice. Sometimes you might only be able see a very small insect or flower. However, it's worthwhile to keep shooting until it appears.
-
RAW format is best. RAW files have more data than JPEGs. They can store more detail. RAW files are better for editing later as you can make adjustments such as cropping and colour correction.
-
Don't forget the background. The background can sometimes add interest to your shot even though it is a foreground item. Try to include it in your photo.
-
Keep learning.